@madpilot makes

Hugo’s Nightlight: Modelling and Printing the Mold Master

Initially I thought about mounting the electronics in the back of the H, trying to fit everything in the footprint of the mold. But if I could get lights on the back, there would be some cool effects I could achieve. To get a consistent glow, the LEDs would need to be wedged in the middle of the H.

This did make mounting the PCB difficult though. I decided that I would mount the H on a small plyth that would house the electronics.

Autodesk Fusion 360 can extrude type, so all I needed to do was pick my type face. I wanted something childlike (not Comic Sans) so I went with Titan One.

Next, shelled, then mirrored to form the two halves. I added some alignment holes, to make gluing easier and finally created some nubs that will act as anchors for the plyth. The nubs were printed as separate parts so I didn’t need to print supports.

Printing

Each of the two halves took around 2 hours to print. Of course, because of how FDM printing works, the result was pretty streaky. The silicon I had literally talks about how fine detail it is, so I would need to do something about the streaks.

My dad used to make scale model aeroplanes, and I always remember him filling the joints with wood putty and then sanding to get a smooth finish, so I thought I would try that.

It turns out the gaps were just too big, and using a water based putty while wet and dry sanding meant the putty would come off.

Next I tried an auto sealer that was supposedly sandable. This didn’t work either because it was too rubbery.

At this point I spent AGES wet and dry sanding, starting at 80-grit and worked my way up to 240 before I found out about auto primer/filler.

This stuff is designed to cover up small scratches in car body work, and is sandable, allowing you to get a really smooth finish.

I did two coats, and sanded with wet and dry, 400 grit, and then a final coat before finishing with an 800 grit. It worked really well. It also saved a lot of time – sanding to a smooth finish is hard.

Hugo’s Nightlight: Part I

Long before Hugo was born, I had hatched a plan to build him a nightlight. Originally inspired by this, I decided to go for something less fragile – a simple H with some RGB LEDs.

Just before Hugo was born, I added a LIFX bulb to our bed side table, and added some Flic buttons that gave us better control on the lights. Using a Node Red flow, I setup the light to go to 5% brightness on a single click, 20% on a double click and a 2 second hold set the light to 100%. This worked really well: if we wanted to check on the baby, we could just single click, and get enough light to see him without waking him.

The downside was if the Flics stopped working we needed to use our phones, so the second requirement was a hardware switch to turn the light on and off. It should have configurable single, double and hold actions.

After Hugo moved to his own room, I wired up the same LIFX and Flic setup, adding a slow fade to the lights, so as to not startle the little fella when the lights switched on or off. I wanted the night light to do the same, so it would need some sort of tweening library.

Finally, a mate of mine was telling me about his kids grow light that turns on in the morning to let the child know that it’s time to wake up. I thought it would be kind of fun to have a cute sun rising animation. I thought about adding an alarm feature in to the light, but decided that I can do that using home assistant and node red, which saved me adding a Real-time clock and having to deal with times and other such nonsense.

Giving these requirements I went and ordered a tape of WS2812B LEDS from AliExpress ($12 for 100!) and got to work.

Making a plastic H

I needed a translucent H. My first thought was to try the usual places to see if there was something I could buy off the shelf. There was a few places that sold acrylic signs that would have been suitable, but they weren’t quite what I was looking for. I really wanted a completely milky white H with the LEDs embedded in the middle.

Well, I have a 3D printed, could I do something with that? I went in a hunt for translucent white filament. It turns out (for reasons I will discover later) that isn’t a thing. Odd.

I picked up some light blue translucent filament and did a small test print, but the print came out really streaky. Not what I wanted.

Then I remembered reading about resin casting. What if I could print a master, cast a mold in silicon, then cast the whole thing in resin? A quick Google for some tutorials and it sees plausible – in fact a bunch of people embed LEDs for cos play jewellery.

The problem is, all the examples I see are clear. You can get pigments to embed in the resin, but a white translucent one alludes me. Hmmm.

At this point I decided to go in to the local Barnes (a store that specialised in casting and other craft stuff) and had a chat with the staff. Apparently white translucent is really hard. The lady I spoke to thought that I might be able to get the effect I want by using a really small amount of pigment. Like, really small (she says that fully opaque happens at about 2%).

I buy a starter pack which has the 500mL of pink silicon, 500mL of resin and a bunch of measuring cups, containers and stirrers. I also bought some modelling clay and some spray on wax as I needed to make a two part mold. Unfortunately, this stuff ain’t cheap – all up it cost me $150.

Next step: Make the master.

Installing IKEA Filur bins into a kitchen cupboard without drilling holes!

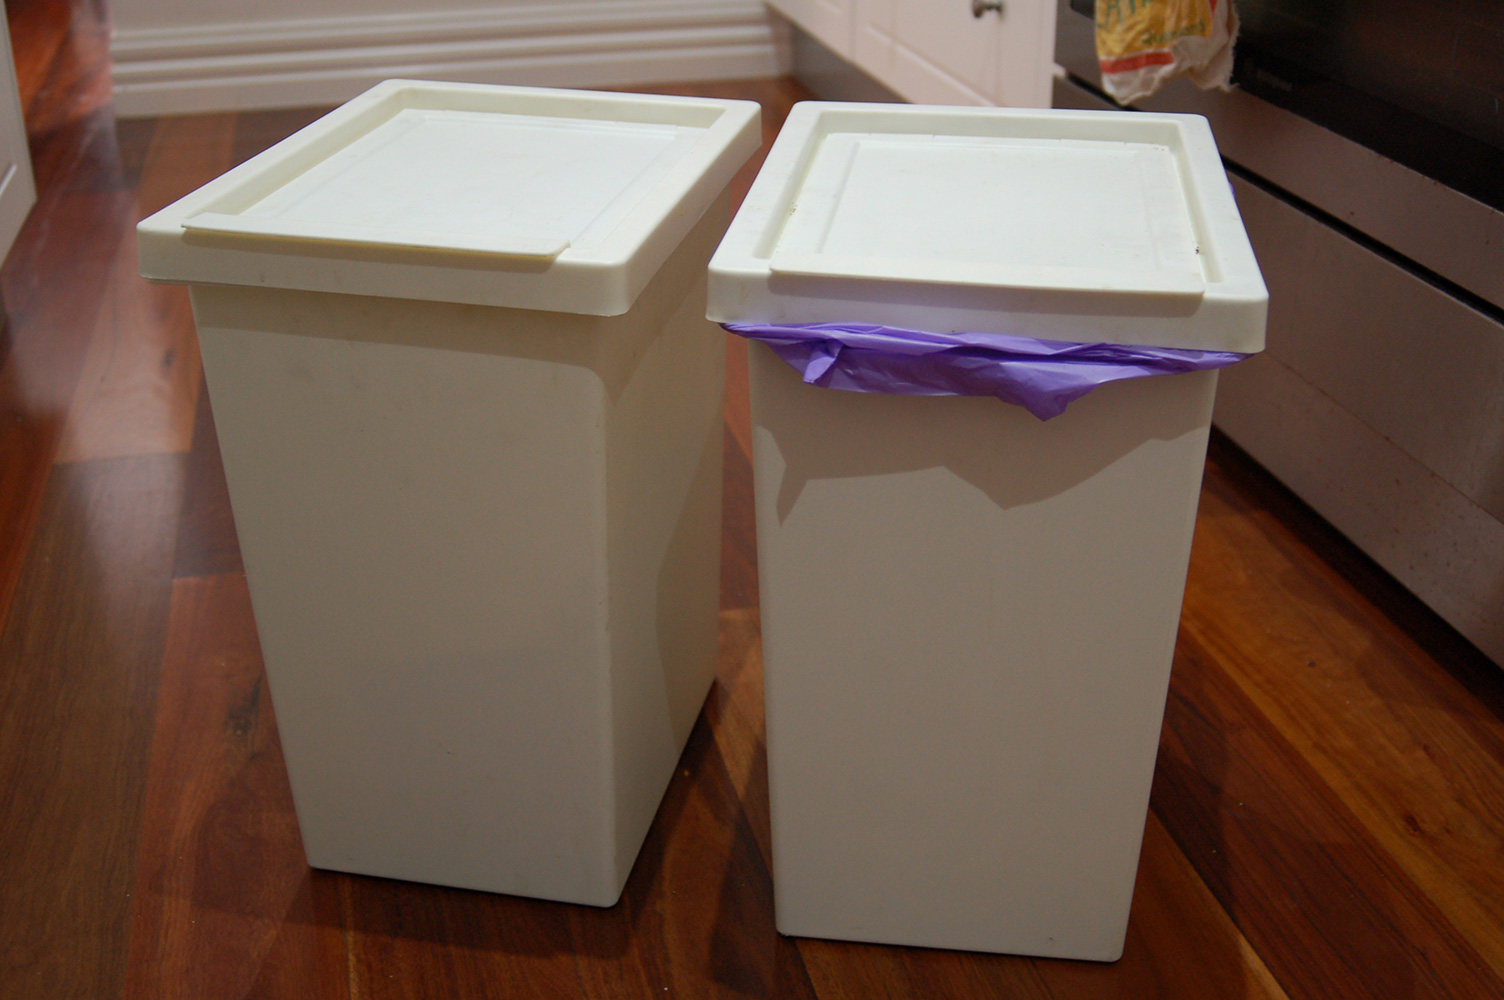
We have two IKEA FILUR bins that we use in our kitchen – one for waste and one for recycling. To stay out of the way, they live in the butler’s pantry. This is a little bit inconvenient though – moving scraps around inevitably means dirty floors.

The IKEA FILUR bins

My wife decided to do a spring clean, and managed to free up a cupboard with the intention of installing cupboard bins. Easy enough. We started looking around, and found them quite small – we’d become accustomed to the good size bins that we already had. Not only that, but new units seemed quite expensive. We weren’t going to spend a lot of money and end up with something worse.

So I decided to build some.

The cupboard have shelf support holes, as most modern kitchens do, so I set myself a constraint: No drilling holes into the existing cupboards. This would allow us to restore the shelves if the bin-in-a-cupboard thing didn’t work, or we decided to move them to another cupboard, or we decided to move house, or some other reason that forced us to remove them.

The first step was the make sure the bins would both physically fit in the cupboard – and they did. By placing them sideways (Which actually made a lot of sense in this case) they fit with just enough space around them. This also allowed us to test a MVP – would having the bins in the cupboard work for us? After a week, we didn’t hate it, so on to the next step.

Time to jump in to Fusion 360, and have a bit of a play around with a few ideas and some dimensions.

My first thought was to have attach some drawer runners to two rectangles of wood that ran around the inside of the cupboard, but this seemed overkill, and the dimensions were a little too tight to make it really work. Next, I wondered about 3D printing some brackets that would hold the drawer runners. I jumped on to the Bunnings web site to find some drawer runners, and I found some likely candidates for just $11. The problem was (as always) no accurate design drawings or dimensions.

But for $11 (and Bunnings’ generous returns policy), I was willing to take a punt.

The Drawer runners attached to the shelf

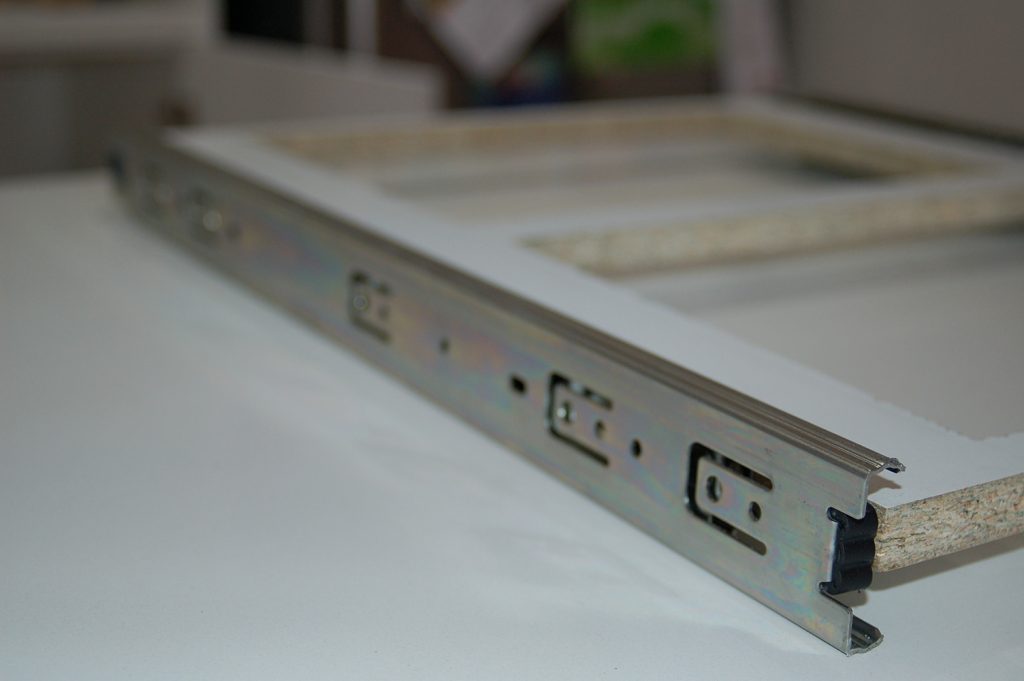
The next problem was how to attach the brackets to the walls of the cupboard. 3D printed plastic nubs probably wasn’t going to cut it – I could see them snapping off in the holes. Next, I thought about embedding some 5mm metal rod, or perhaps removing the plastic off the existing shelf supports. I then did a quick search on the Bunnings website and found these all metal shelf supports with metal lugs that would work perfectly (for a grand total off $2.67!). Off to Bunnings!

One sausage sizzle later, I had the bits I needed.

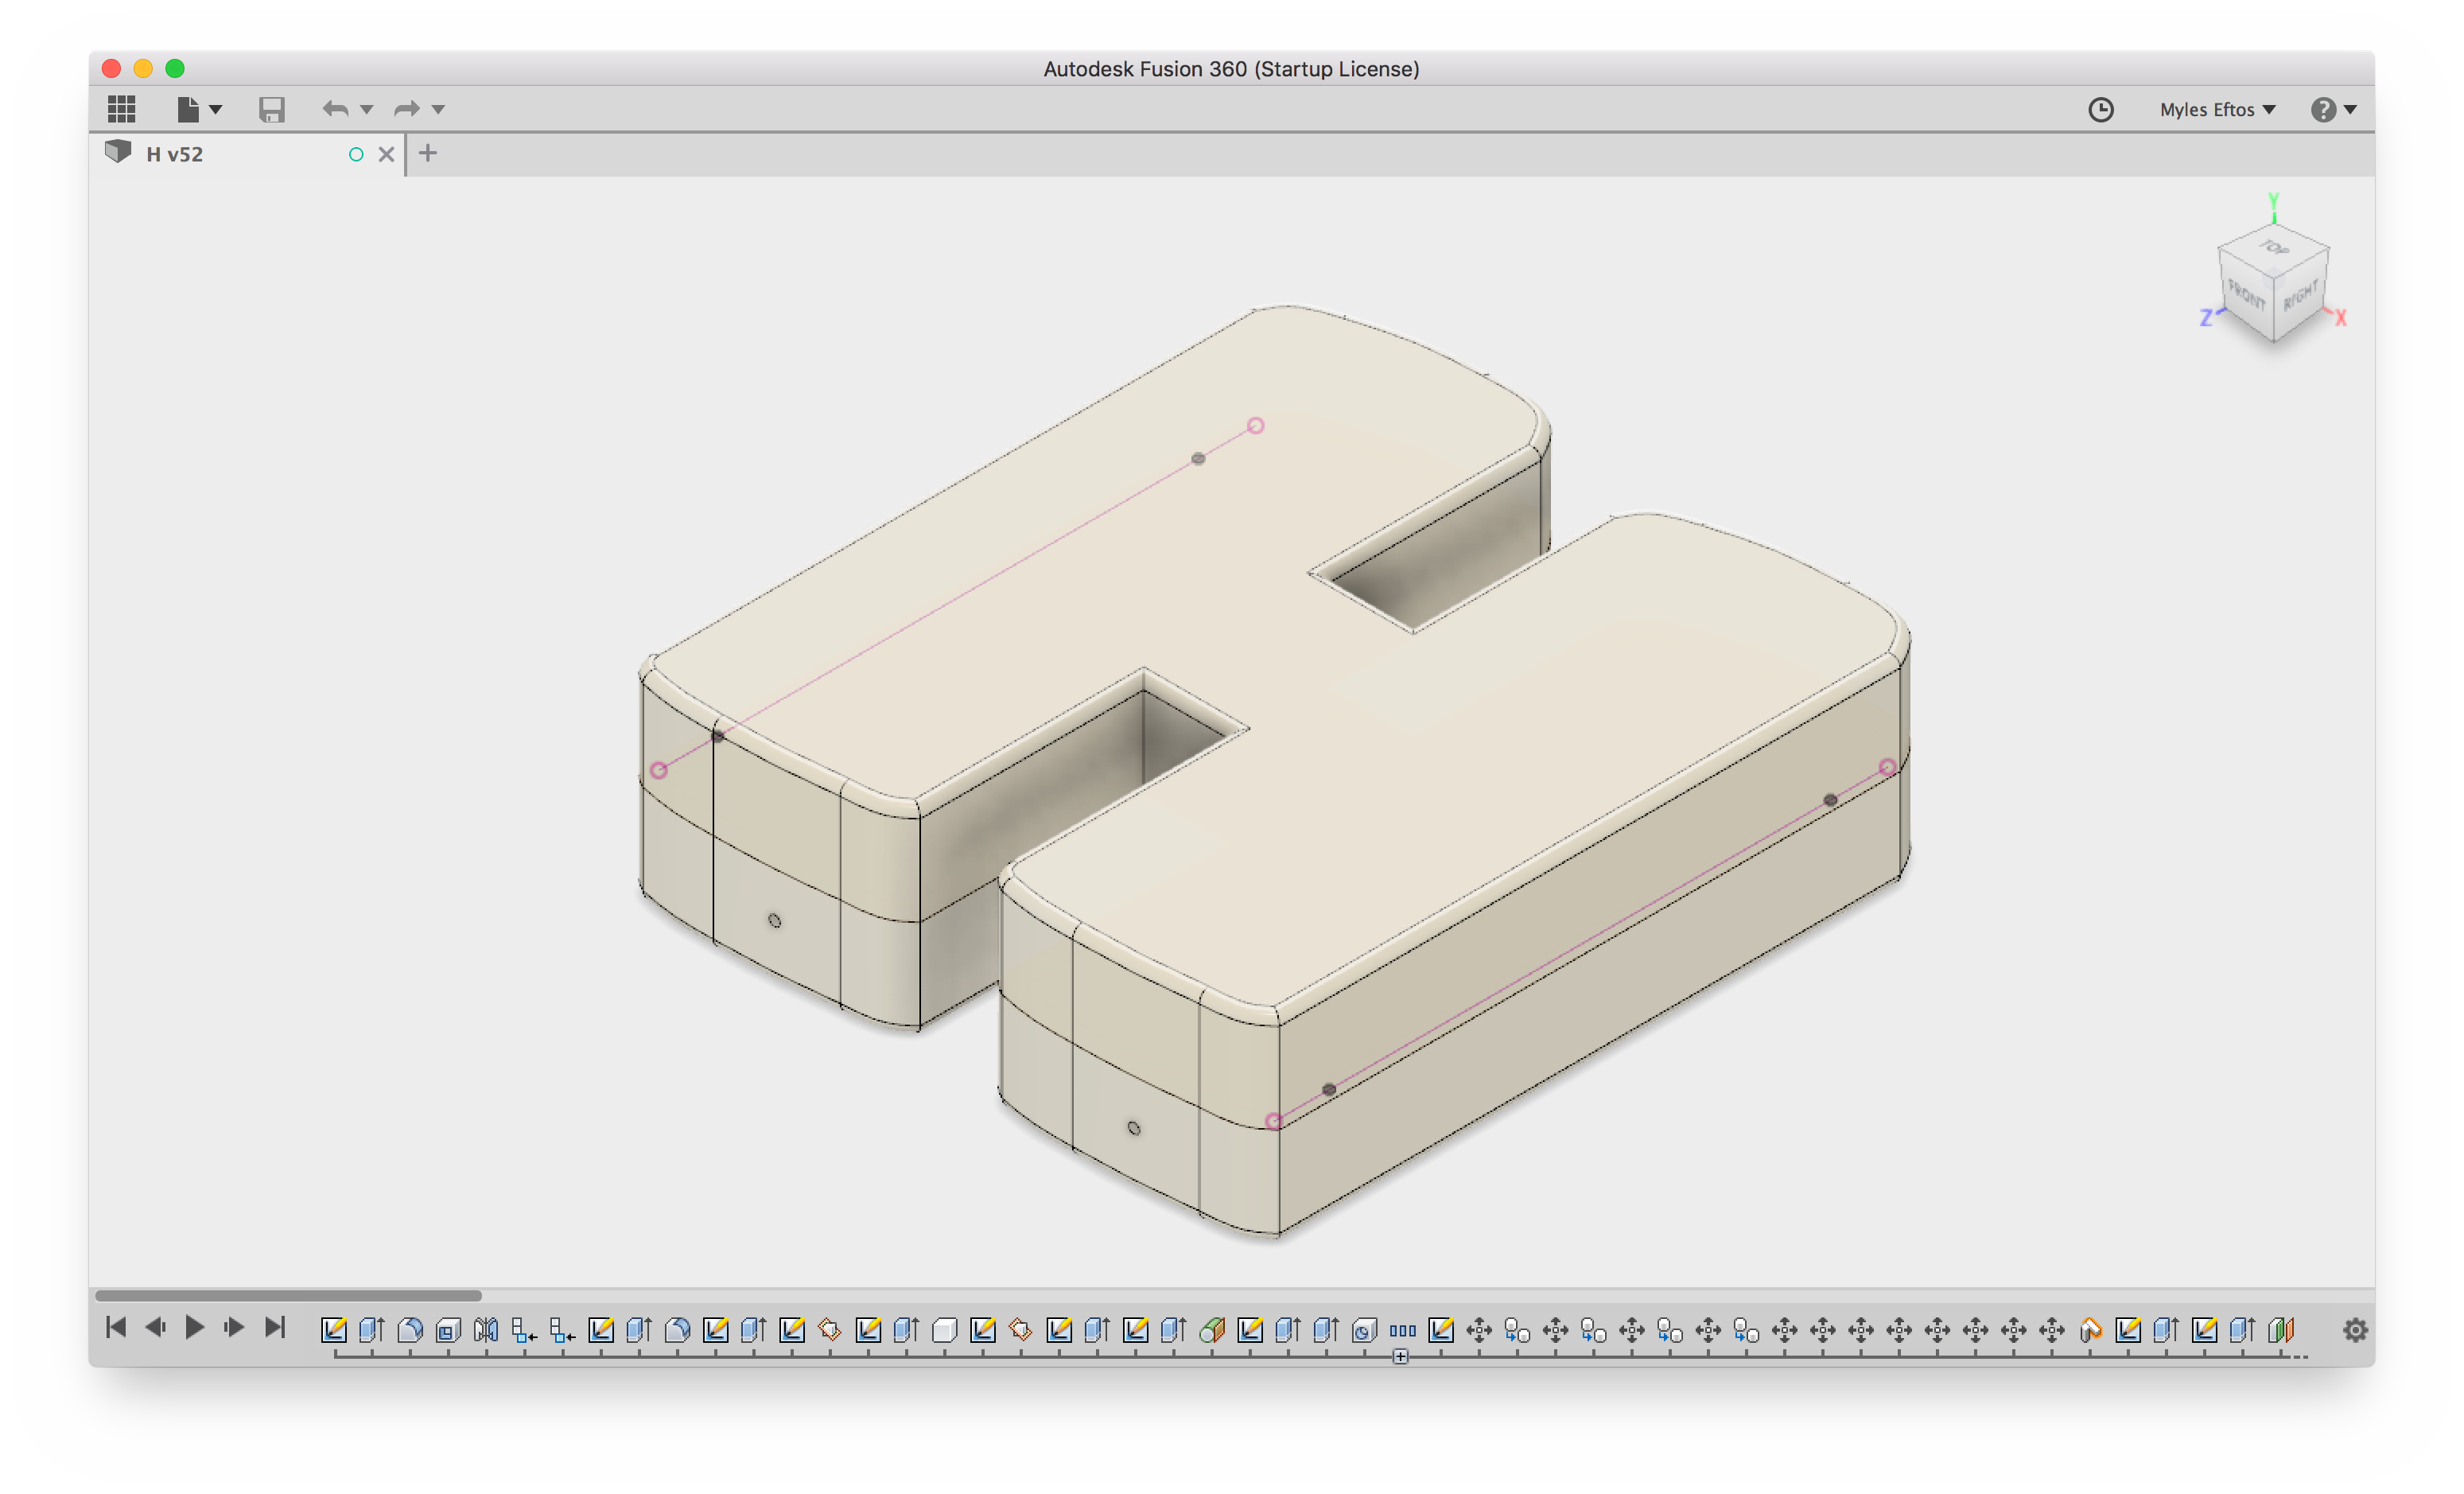
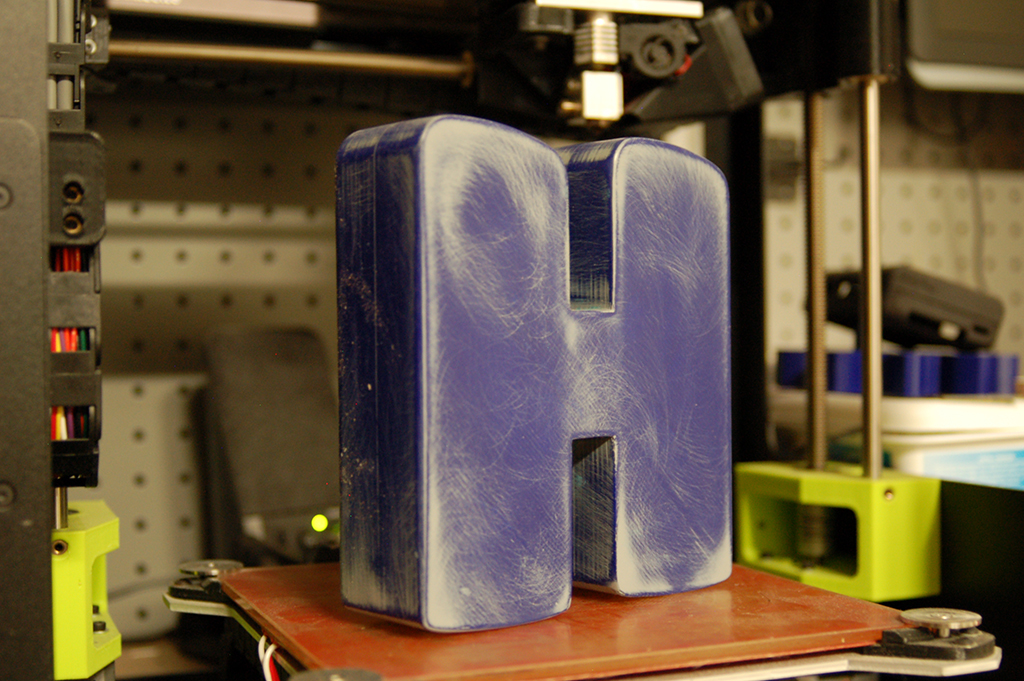
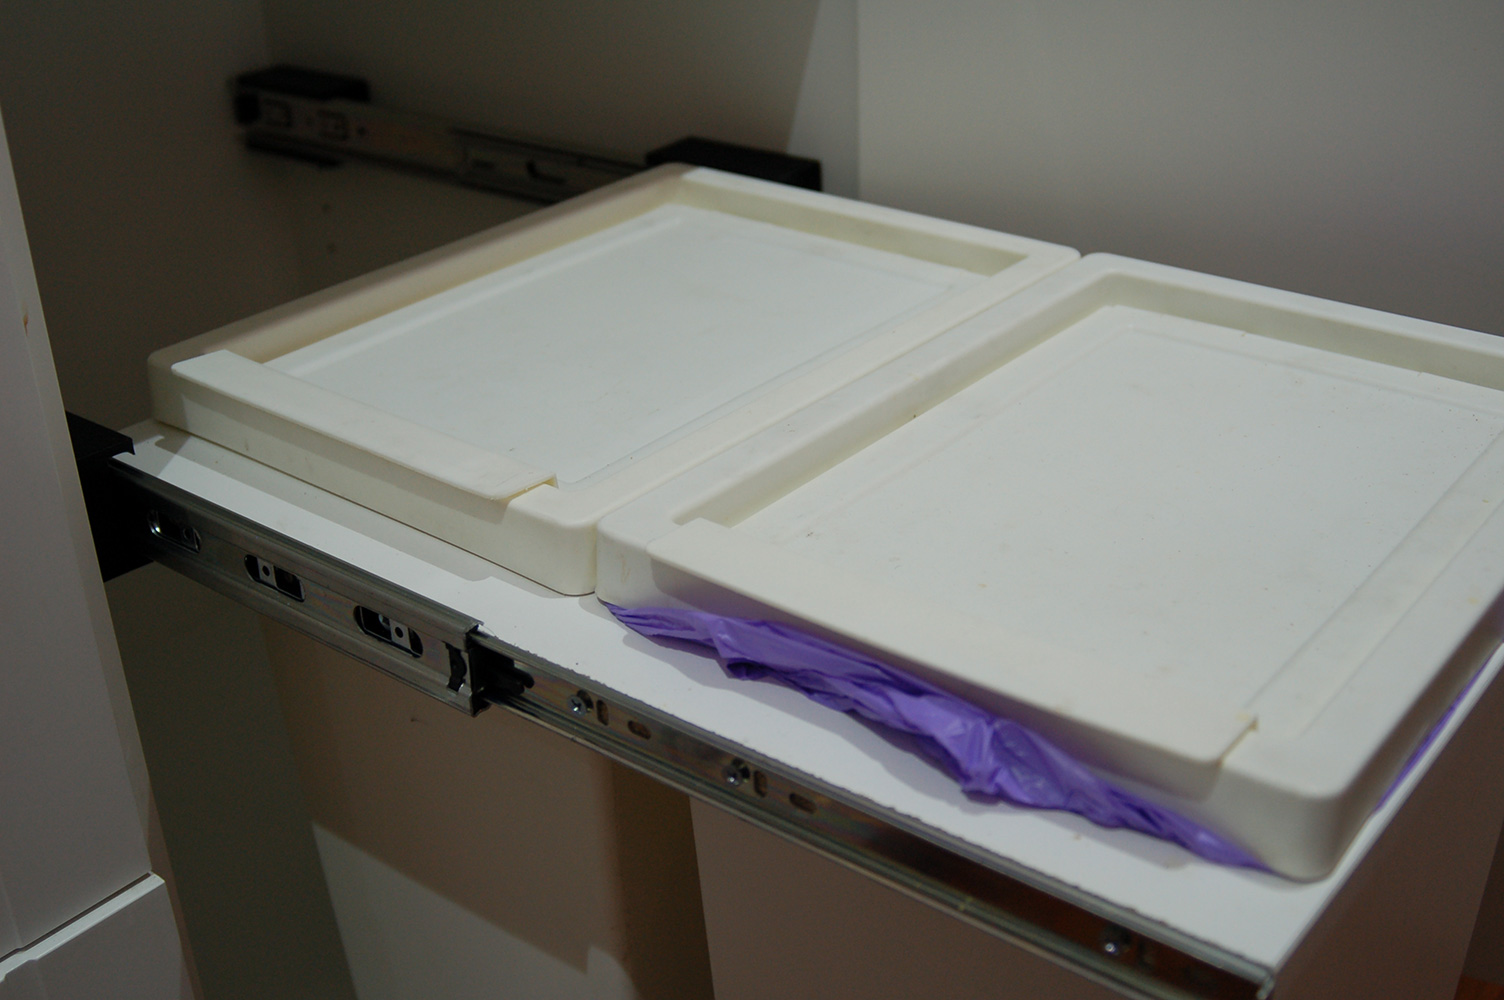
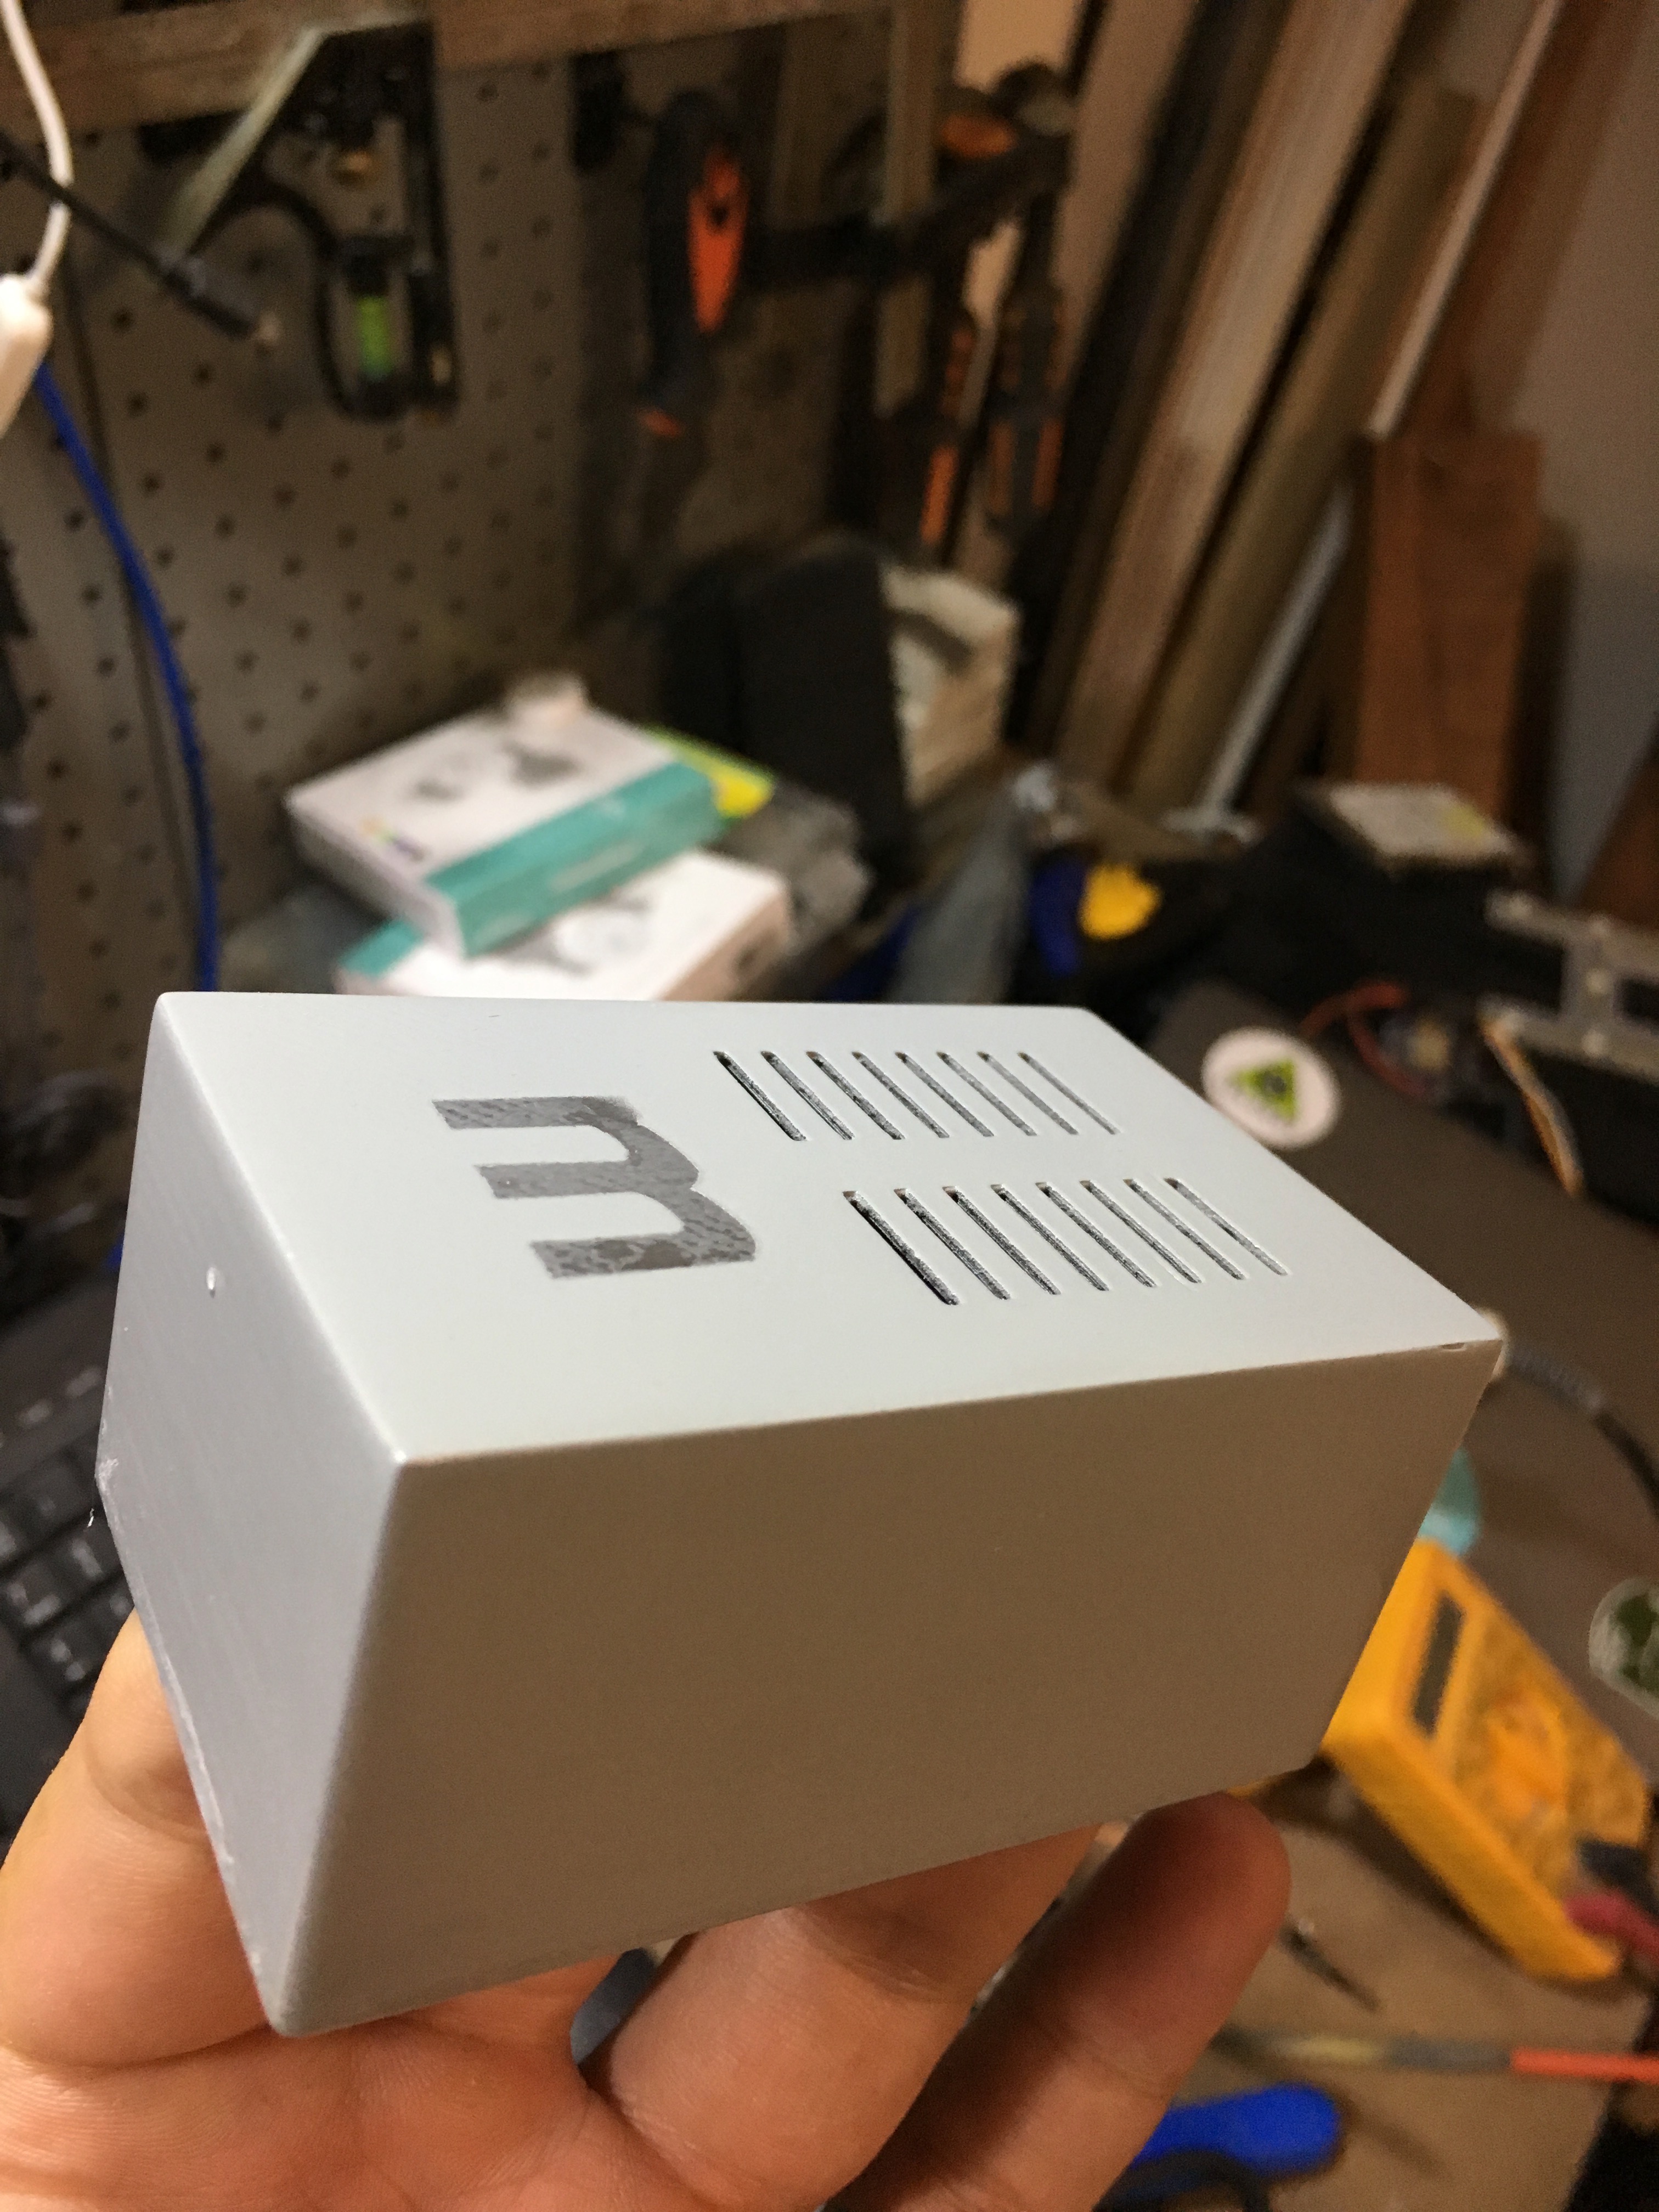
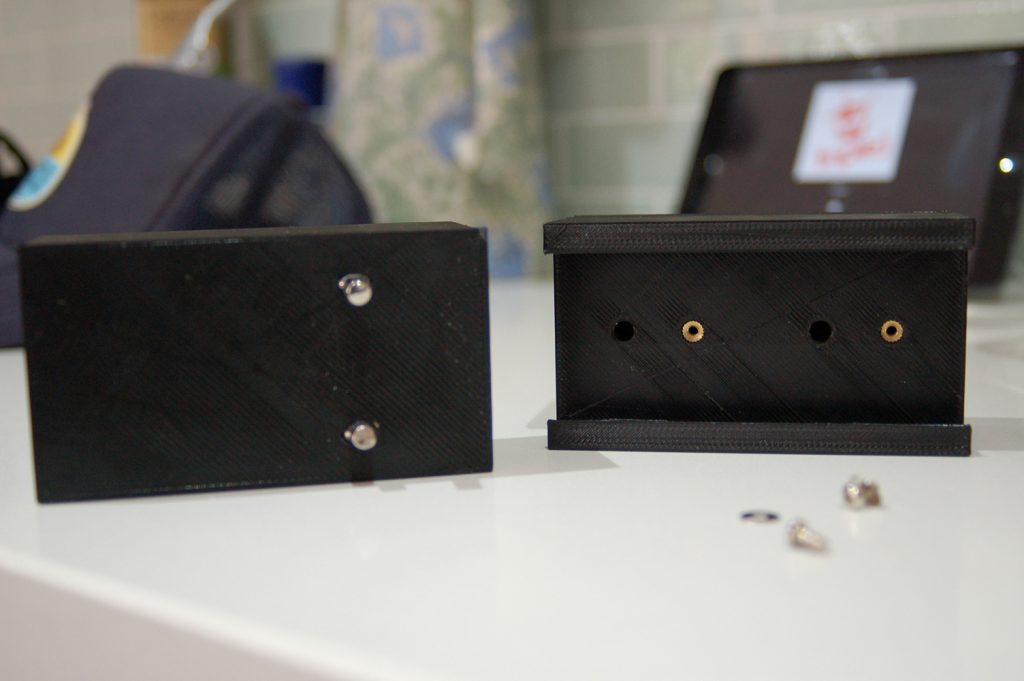
Now I had the dimensions of the drawer runners and the supports, I whipped up a quick design, and 2 hours later I had printed the first bracket to test for fit. Initially, I was going to rely on brass inserts and screws to secure the runners, but I added a small curve to add a some additional support. This worked out better than expected – the curves would happily hold the runners without the screws (although I still added two screws on the back off the runners to keep them in place when pulling out the bins). When it came to attaching the metal inserts, I thought of using heat like I did with the brass inserts, but it turned out a hammer and friction was enough to hold them in – and the platform that the bins would live in would actually push the runners out, holding the whole thing together.

So over the next 6 hours, I printed the remainder of the brackets.

Two of the printed bracket

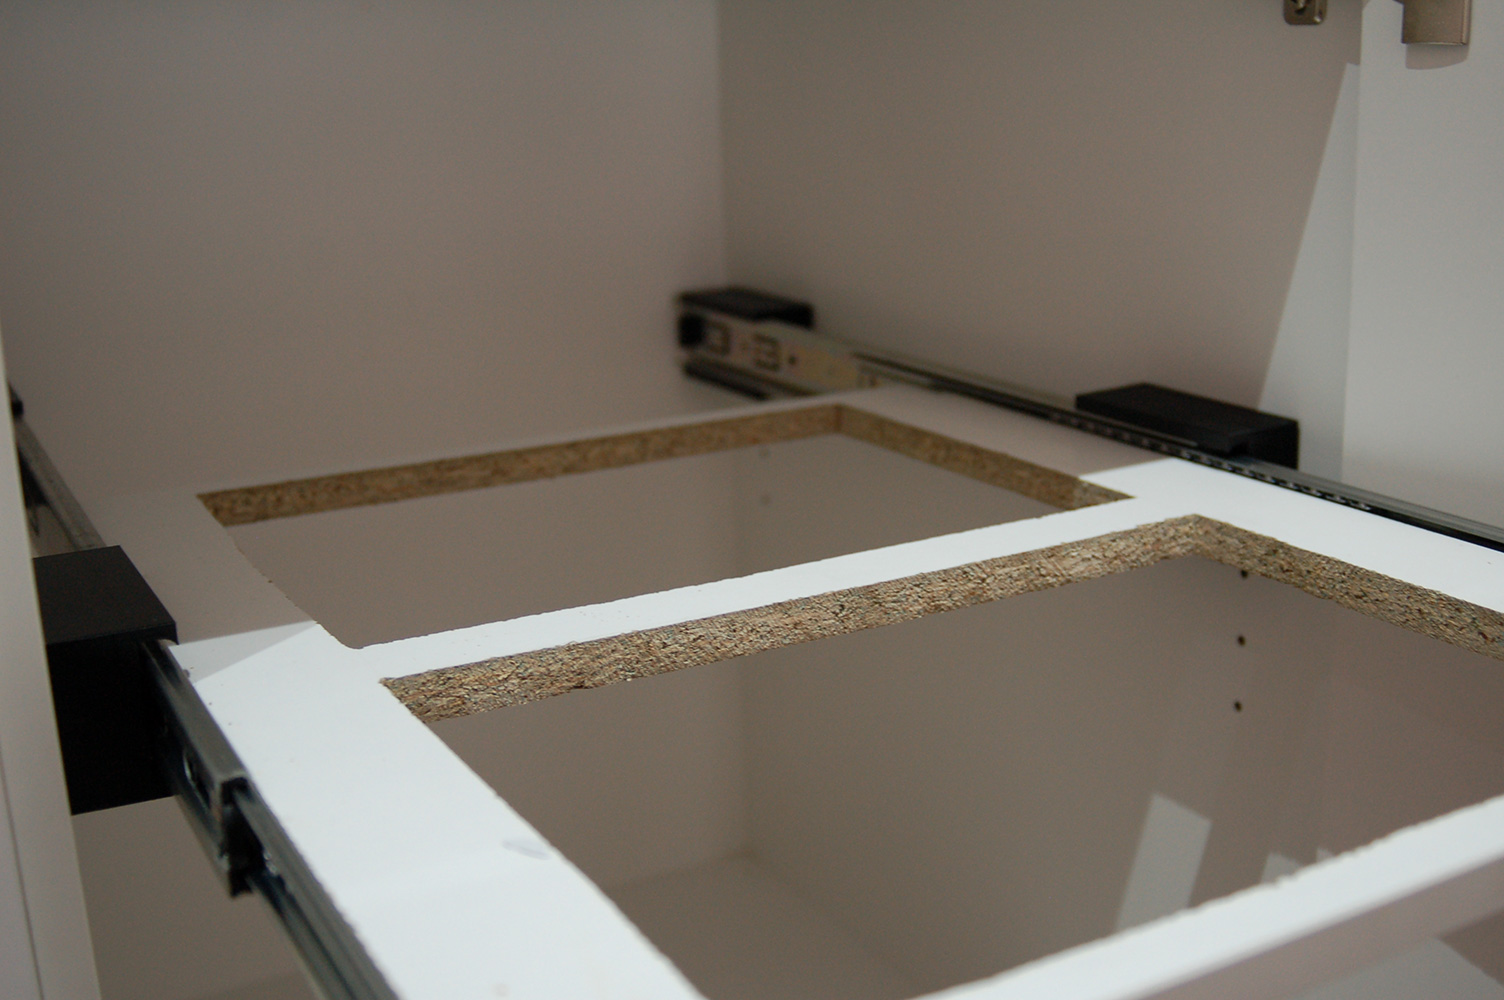
Once the were done and installed, I could get final measurements for the shelf. This was where designing it in CAD helped – according to my calculations, it would need to be 420mm, and I was dead on. Initially, I was going to buy some melamine coated MDF, but then I decide to cut the existing shelf (which just so happened to be melamine coated MDF) to size.

Cutting the 500x550mm panel to 420x550mm was easy work, but the internal holes for the bins were a little more challenging as I couldn’t find my jigsaw. I used a multisaw, which in theory should be the same, but was ended up being slower and more difficult to use. As a result, the holes looked like it was cutout by a drunk monkey. Nothing a bit of rasping couldn’t fix. Besides – the bins will cover a multitude of sins. All in all, the result was good enough.

Fitted

It was at this point, I made a minor mistake in drilling the holes for the runners – they are offset from centre, and I drilled one side on the wrong side, but that was easy enough to fix, just by drilling them on the other side of the centre line.

Putting it together was slightly more challenging, as I needed to screw in the support screws whilst in-situ, and had to do a bit of a contortion act to get them in. But once it was in, it all worked really well. The shelf could have possibly done with 1mm extra cutout, so the run was a little smoother, but it’s totally fine as is.

The bins installed on the drawer

The other thing I would change it to make the non-door side thinner, so the there wasn’t such a massive gap between the cupboard wall and the runner – the gap on he door side is needed to give clearance from the hinges, and I went for symmetry, but it does look a little odd. It would have made the print time much less too. Oh well – next time!

So for a grand total of $13.67 (plus about $3 in plastic), 45 minutes off design time, and 8 hours of print time, our bins now live in a cupboard!

Download the design on Thingiverse.

A case and POE for the OrangePI

Technically, the OrangePI Zero supports a type of Power of Ethernet, but this makes it compliant.

..and uses a cheat – you can buy POE splitters off Aliexpress – this hack removes the Ethernet port off the OrangePI, and permanently attaches the splitter. I also 3D printed a case for it, which is the interesting part, as I experiment with post production.

I use an OrangePi as a server for my Flic bluetooth buttons. I use POE to power it, so I don’t need to bother with plug packs, however, it all looks a little untidy (why do Pi clone manufacturers always put the power plug on the front!?).

I’ve also been meaning to experiment with sanding and spray painting 3D prints, so I thought I’d kill two birds with one stone.

Adding the POE splitter to the OrangePi

  1. Desolder the Ethernet socket from the OrangePI. I used a desoldering needle.
  2. Desolder the ethernet and power cable from the POE splitter
  3. Use ethernet cable to join to the two Ethernet pads. Make sure you maintain the twists between pairs. I also soldered two pin headers into the support holes either side of the Ethernet sockets, to give some physical support.

Printing the Case

  1. You can download the models from Thingiverse
  2. No need for to print supports – 20% infill is fine. Once printed, you need to cut off the board support clips at the top of the pylons – they don’t work. Drill two 2.5mm holes in the two rear pylons.
  3. Insert brass inserts into the corner holes.

Painting

FDM 3D printing is quite streaky, and looks… well, like it was 3D printed. I print in PLA, so acetate vapor is out off the question, making good, old fashioned sanding and painting the easiest way to get it looking it good.

The first time I tried this I sanded the thing completely smooth, and it took ages. I found other people have had success using automotive primer/filler which fills smaller scratches.

I tried this, but the gaps were too big. I went aggressive, and started with 120grit wet-and-dry sand paper. I added another two coats of primer/filler. Next, I went to town with 400 grit, then 800 grit.

I wanted to see if I could paint a logo in the top, so I did an undercoat of satin silver, placed a sticker over it and then painted a top coat of satin grey.

It looked terrible.

  1. The sticker lifted, so the edges off the logo were blurry.
  2. Satin shows up ALL the gaps, so even after all the sanding, the lines were still visible
  3. I over painted, so there was drips, and it looked thick and gross
  4. The colour wasn’t… great.

I re-sanded with 400-grit to get rid of the paint, and polished again with 800-grit. This time I omitted the extra coat of primer/filler, and just applied two LIGHT coats of flat (matt) black paint. This time the result was great!

Matt paint actually fills gaps a little bit, so the result is much better. There are still some visible lines (in the right light), so clearly I need to sand more. Also – I missed some bits on the bottom section. Clearly I still need some practice.

I wouldn’t mind trying the satin finish again, with out being so heavy handed on the pain