@madpilot makes

Hugo’s Nightlight: Modelling and Printing the Mold Master

Initially I thought about mounting the electronics in the back of the H, trying to fit everything in the footprint of the mold. But if I could get lights on the back, there would be some cool effects I could achieve. To get a consistent glow, the LEDs would need to be wedged in the middle of the H.

This did make mounting the PCB difficult though. I decided that I would mount the H on a small plyth that would house the electronics.

Autodesk Fusion 360 can extrude type, so all I needed to do was pick my type face. I wanted something childlike (not Comic Sans) so I went with Titan One.

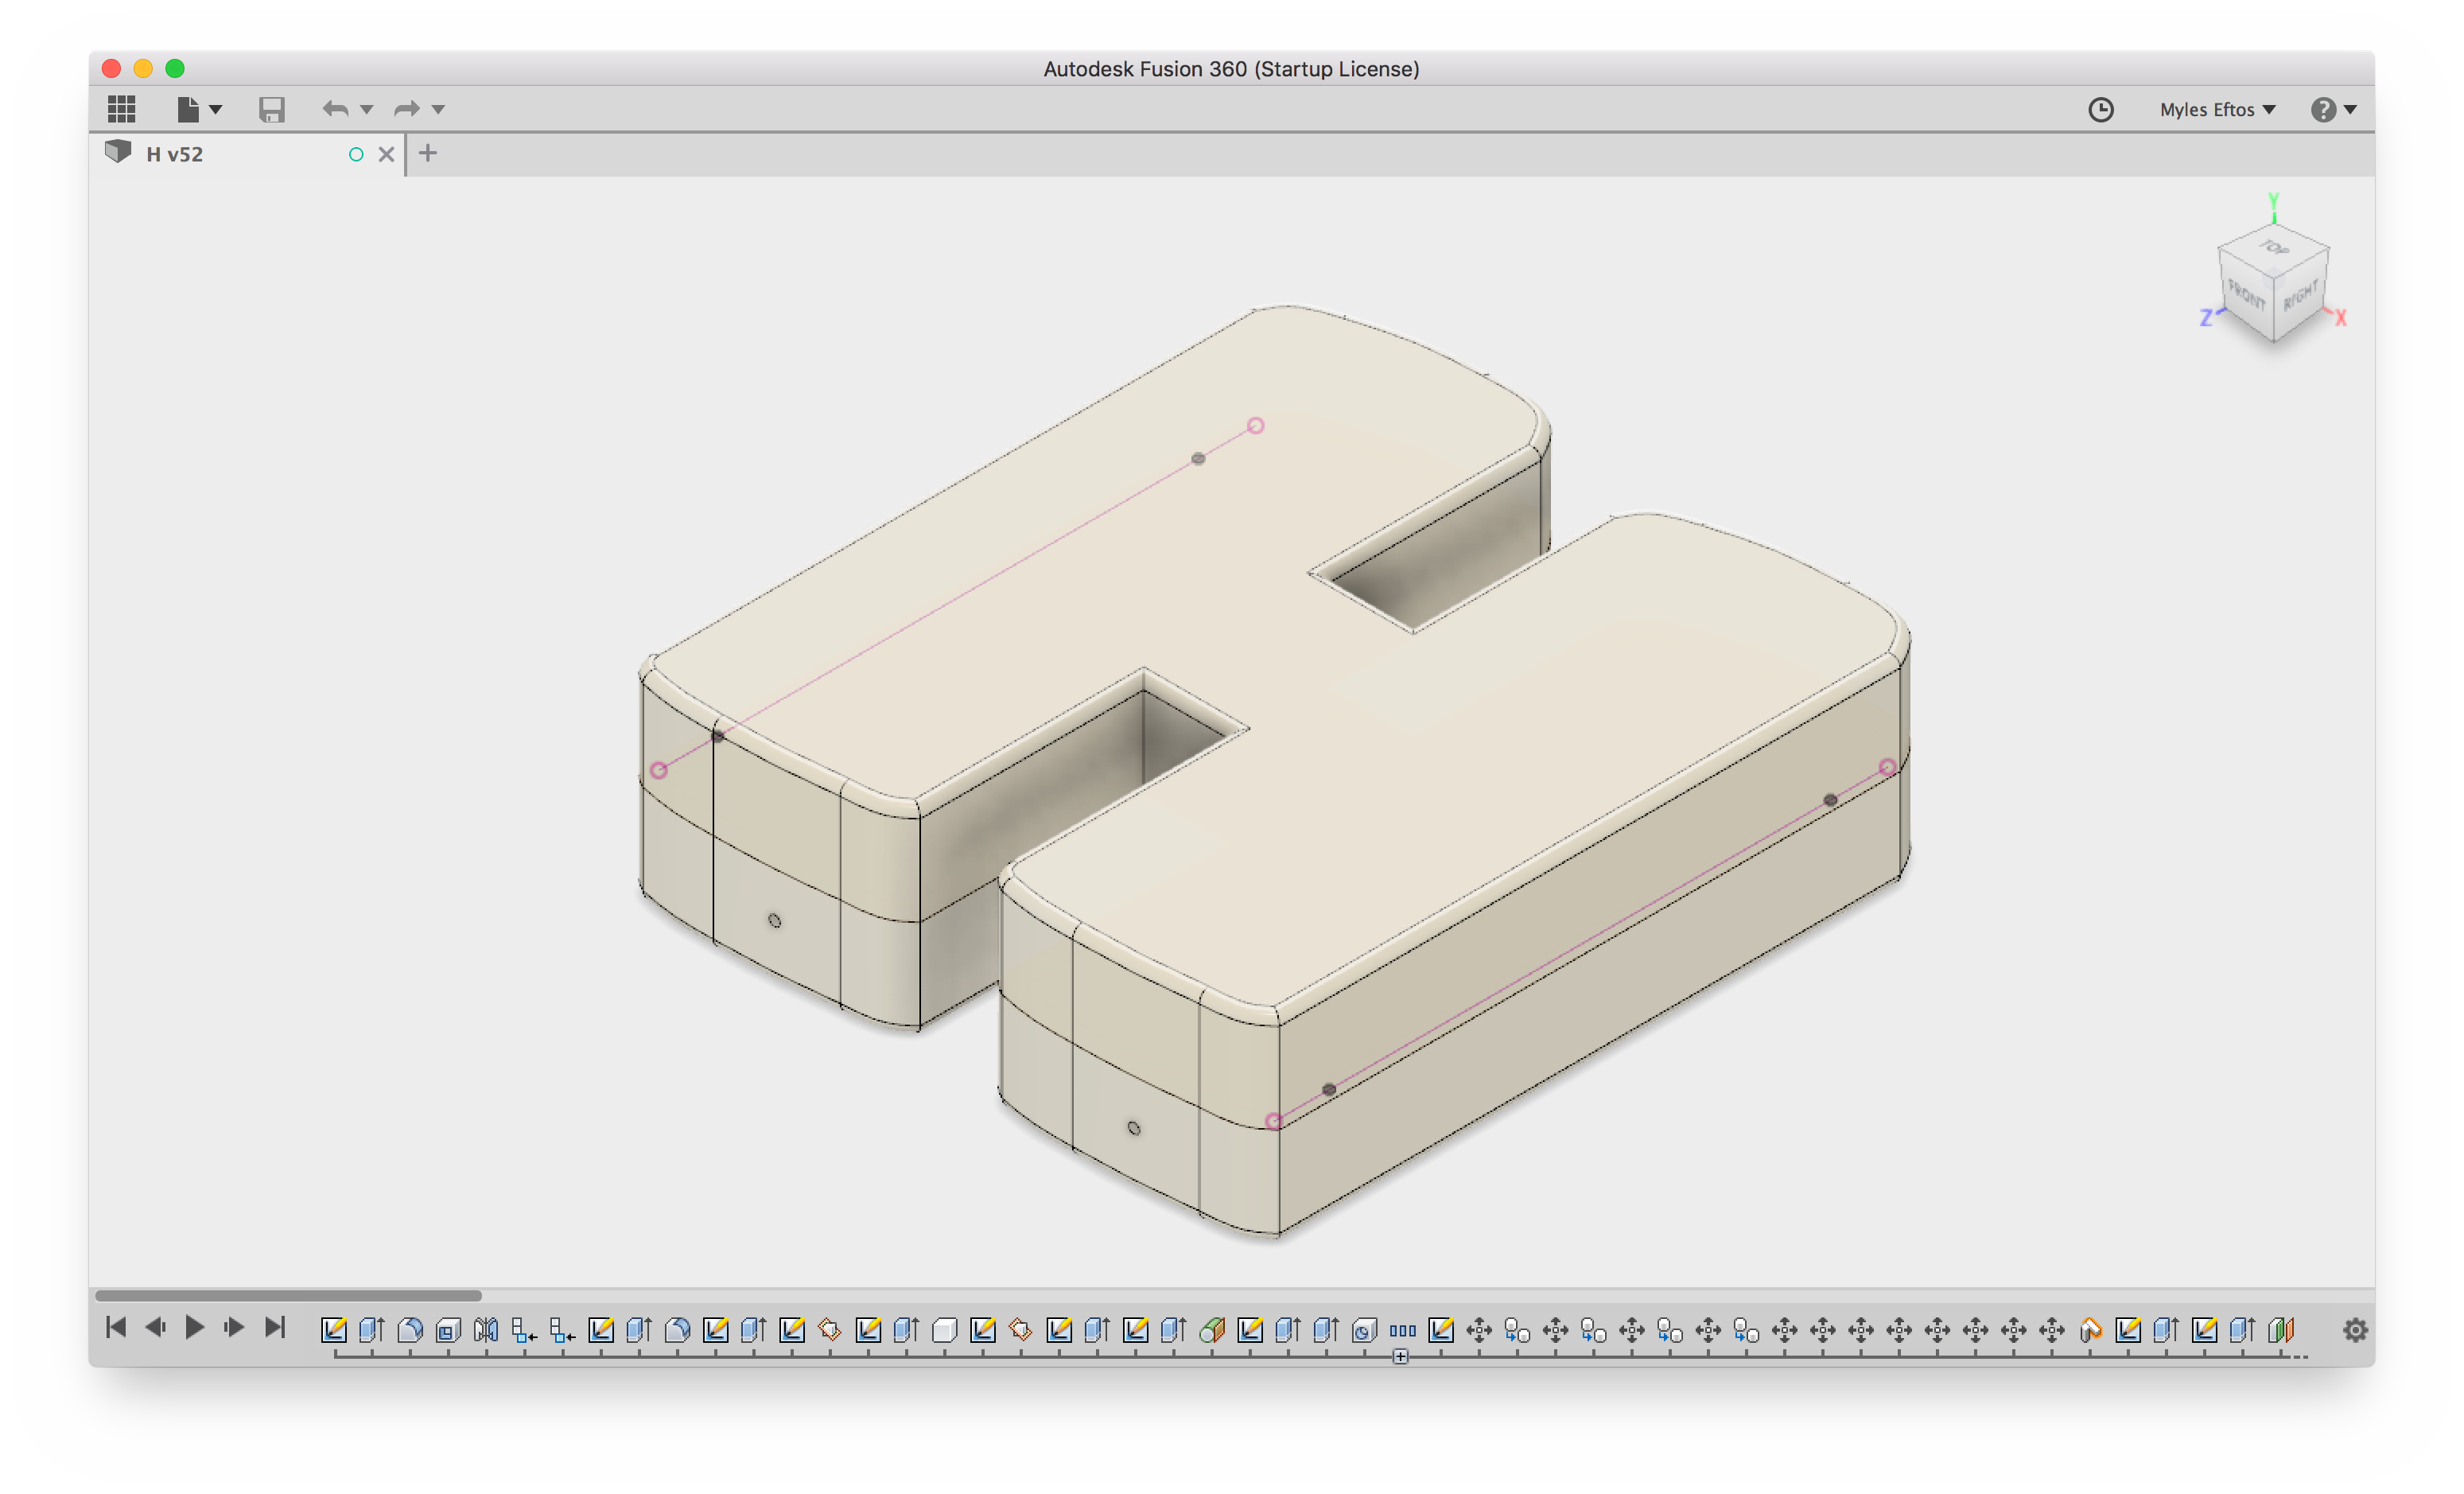
Next, shelled, then mirrored to form the two halves. I added some alignment holes, to make gluing easier and finally created some nubs that will act as anchors for the plyth. The nubs were printed as separate parts so I didn’t need to print supports.
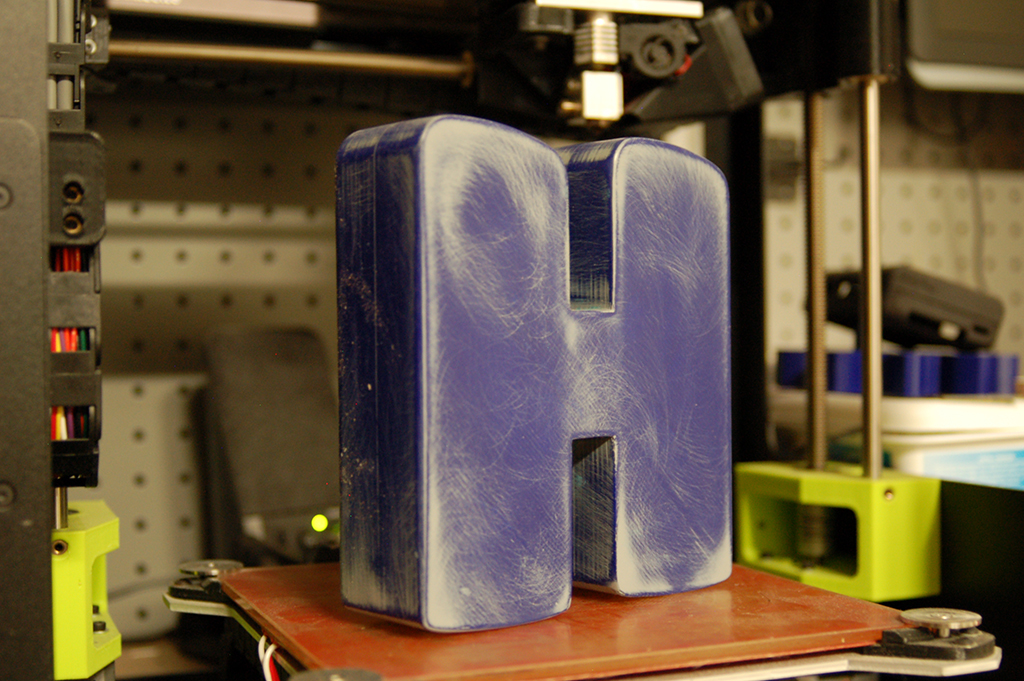
Printing

Each of the two halves took around 2 hours to print. Of course, because of how FDM printing works, the result was pretty streaky. The silicon I had literally talks about how fine detail it is, so I would need to do something about the streaks.

My dad used to make scale model aeroplanes, and I always remember him filling the joints with wood putty and then sanding to get a smooth finish, so I thought I would try that.

It turns out the gaps were just too big, and using a water based putty while wet and dry sanding meant the putty would come off.

Next I tried an auto sealer that was supposedly sandable. This didn’t work either because it was too rubbery.

At this point I spent AGES wet and dry sanding, starting at 80-grit and worked my way up to 240 before I found out about auto primer/filler.

This stuff is designed to cover up small scratches in car body work, and is sandable, allowing you to get a really smooth finish.

I did two coats, and sanded with wet and dry, 400 grit, and then a final coat before finishing with an 800 grit. It worked really well. It also saved a lot of time – sanding to a smooth finish is hard.

Hugo’s Nightlight: Part I

Long before Hugo was born, I had hatched a plan to build him a nightlight. Originally inspired by this, I decided to go for something less fragile – a simple H with some RGB LEDs.

Just before Hugo was born, I added a LIFX bulb to our bed side table, and added some Flic buttons that gave us better control on the lights. Using a Node Red flow, I setup the light to go to 5% brightness on a single click, 20% on a double click and a 2 second hold set the light to 100%. This worked really well: if we wanted to check on the baby, we could just single click, and get enough light to see him without waking him.

The downside was if the Flics stopped working we needed to use our phones, so the second requirement was a hardware switch to turn the light on and off. It should have configurable single, double and hold actions.

After Hugo moved to his own room, I wired up the same LIFX and Flic setup, adding a slow fade to the lights, so as to not startle the little fella when the lights switched on or off. I wanted the night light to do the same, so it would need some sort of tweening library.

Finally, a mate of mine was telling me about his kids grow light that turns on in the morning to let the child know that it’s time to wake up. I thought it would be kind of fun to have a cute sun rising animation. I thought about adding an alarm feature in to the light, but decided that I can do that using home assistant and node red, which saved me adding a Real-time clock and having to deal with times and other such nonsense.

Giving these requirements I went and ordered a tape of WS2812B LEDS from AliExpress ($12 for 100!) and got to work.

Making a plastic H

I needed a translucent H. My first thought was to try the usual places to see if there was something I could buy off the shelf. There was a few places that sold acrylic signs that would have been suitable, but they weren’t quite what I was looking for. I really wanted a completely milky white H with the LEDs embedded in the middle.

Well, I have a 3D printed, could I do something with that? I went in a hunt for translucent white filament. It turns out (for reasons I will discover later) that isn’t a thing. Odd.

I picked up some light blue translucent filament and did a small test print, but the print came out really streaky. Not what I wanted.

Then I remembered reading about resin casting. What if I could print a master, cast a mold in silicon, then cast the whole thing in resin? A quick Google for some tutorials and it sees plausible – in fact a bunch of people embed LEDs for cos play jewellery.

The problem is, all the examples I see are clear. You can get pigments to embed in the resin, but a white translucent one alludes me. Hmmm.

At this point I decided to go in to the local Barnes (a store that specialised in casting and other craft stuff) and had a chat with the staff. Apparently white translucent is really hard. The lady I spoke to thought that I might be able to get the effect I want by using a really small amount of pigment. Like, really small (she says that fully opaque happens at about 2%).

I buy a starter pack which has the 500mL of pink silicon, 500mL of resin and a bunch of measuring cups, containers and stirrers. I also bought some modelling clay and some spray on wax as I needed to make a two part mold. Unfortunately, this stuff ain’t cheap – all up it cost me $150.

Next step: Make the master.